Author name: drawingartificer

Best Professional Makeup Brushes Set
Blog

Best Professional Makeup Brushes Set

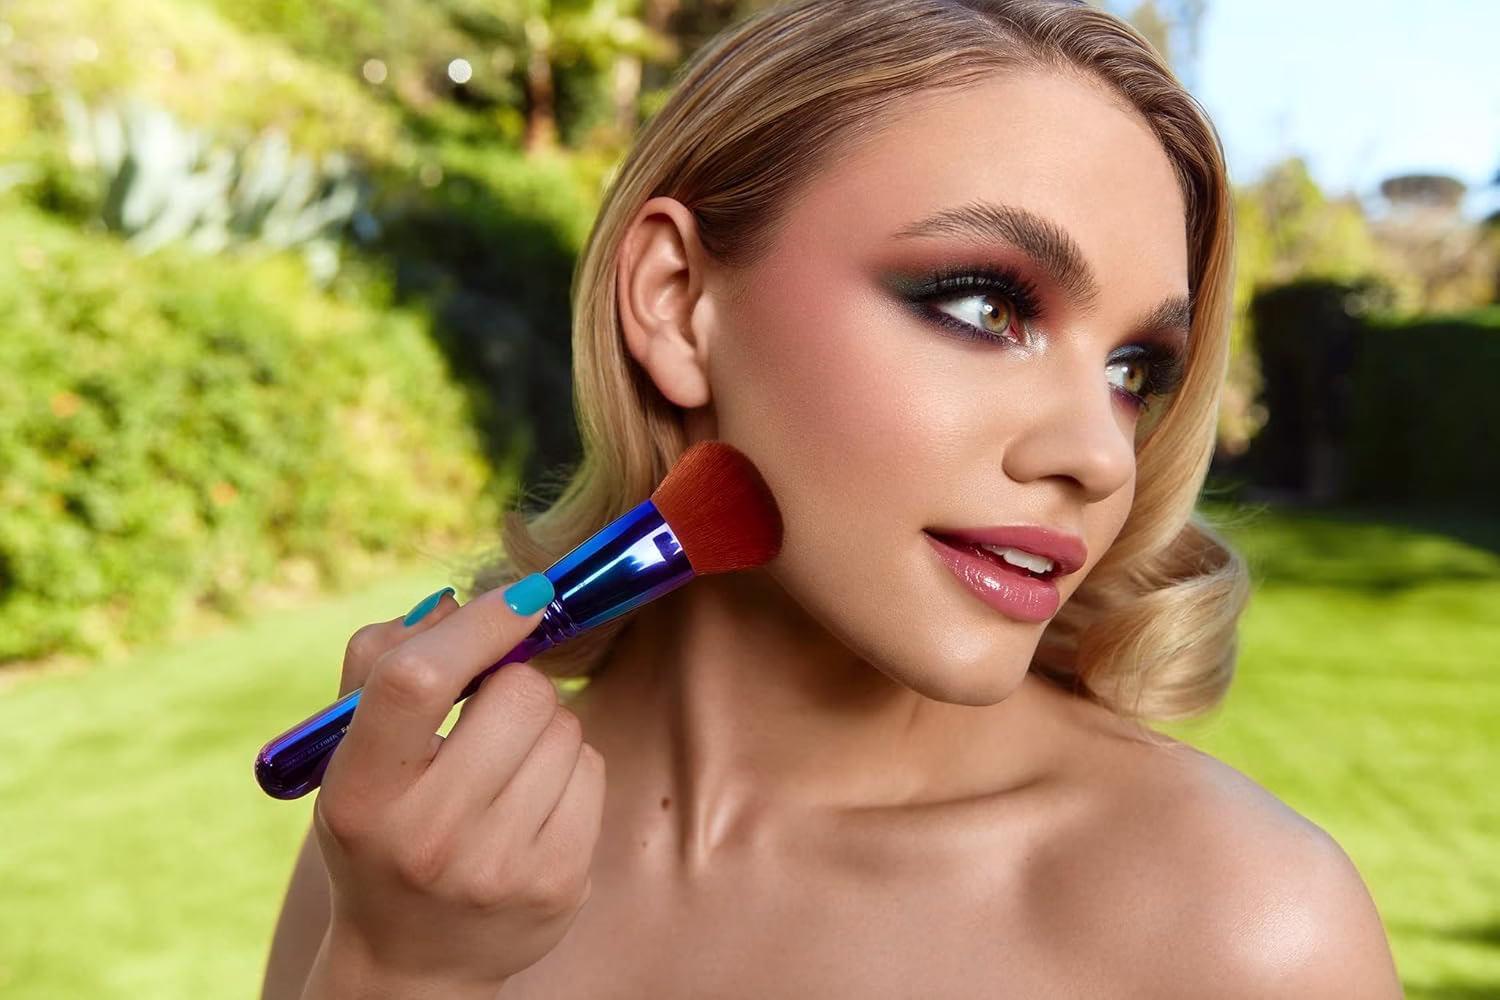
If you’re a seasoned makeup artist or someone who simply loves experimenting with beauty products, having the right set of makeup brushes can truly transform your application process. Great tools improve precision and help you make the most of your cosmetics. With a wide range of brush sets available today, choosing the perfect one can feel overwhelming. That’s why we’ve curated a detailed review of the best professional makeup brush sets on the market, helping you confidently make an informed decision. 1. Sigma Beauty Essential Brush Kit – Best for Full-Face Coverage If you’re searching for a top-tier makeup brush set trusted by professionals worldwide, the Sigma Beauty Essential Kit is a worthy investment. This 12-piece set is perfect for achieving a full-face makeup look with ease and precision. What Makes It Stand Out: Ideal For: Professional makeup artists and enthusiasts who want premium quality with long-lasting durability. 2. Real Techniques Everyday Essentials – Best Affordable Option Quality doesn’t always have to come with a high price tag. The Real Techniques Everyday Essentials set proves this by offering a well-rounded selection of tools at a budget-friendly price. Why It’s Loved: Perfect For: Beginners or makeup users looking for a budget-friendly yet effective brush set. 3. Morphe Vegan Pro 18-Piece Brush Set – Best for Versatility If variety and functionality are your priorities, the Morphe Vegan Pro 18-piece set delivers. It’s tailored for makeup lovers who like to experiment with different looks. What Sets It Apart: Best Suited For: Aspiring makeup artists or beauty influencers who need an expansive toolkit. 4. IT Cosmetics Heavenly Luxe™ Brush Set – Best for Sensitive Skin For those with sensitive or delicate skin, the IT Cosmetics Heavenly Luxe™ brushes are a dream come true. Known for their incredibly soft texture, these brushes feel like silk against the skin. Highlights: Ideal For: Users with sensitive skin who value comfort without compromising performance. 5. Zoeva Classic Brush Set – Best for Precision and Craftsmanship Zoeva is synonymous with elegance and quality. The Classic Brush Set combines both aesthetics and precision to create a set that’s as beautiful as it is functional. Why It Stands Out: Best For: Those who appreciate fine craftsmanship and want brushes that perform with expert-level precision. How to Choose the Best Professional Makeup Brush Set Choosing the right brush set depends on your makeup style, skill level, and skin type. Here are a few key things to consider: 1. Bristle Type 2. Handle Design Look for brushes with comfortable, ergonomic handles that offer good control. A sturdy handle improves precision and feels more balanced in the hand. 3. Range of Brushes A good set should include: 4. Maintenance and Durability Brushes should hold their shape after washing and not shed bristles. Investing in a high-quality set often means fewer replacements over time. 5. Ethical Choices Many users now prefer cruelty-free and vegan options. Fortunately, most top brands have adopted ethical practices without sacrificing quality. You may want to read about double rhythm 05 oz cat eye gel polish FAQs About Professional Makeup Brush Sets Q: How often should I clean my makeup brushes? A: Ideally, clean your brushes once a week to prevent bacteria buildup and ensure smooth application. Brushes used for cream or liquid products may need more frequent cleaning. Q: Are expensive makeup brushes worth it? A: While budget brushes can perform well, high-end brushes usually offer better durability, more precision, and a luxurious feel. They are a smart investment for frequent users. Q: Can I mix and match brush sets from different brands? A: Absolutely! Many professionals customize their kits by combining favorite brushes from different brands. Q: What should I use to clean my brushes? A: Use a gentle brush cleanser or baby shampoo with lukewarm water. Avoid harsh detergents, and let them air-dry with bristles facing downward. Q: Do I need all the brushes in a large set? A: Not necessarily. Choose a set that matches your routine. If you stick to minimal makeup, a smaller set with multi-functional brushes might be better suited. Final Thoughts A great makeup brush set can significantly elevate your beauty routine. Whether you’re going for a soft everyday glow or a bold glam look, the tools you use play a critical role in the outcome. From the luxurious feel of Sigma Beauty to the budget-friendly efficiency of Real Techniques, there’s a perfect set for every user. Keep in mind your preferences, skin type, and the type of makeup you use regularly when choosing your ideal kit. With the right brushes in hand, achieving a flawless finish becomes not just easier but genuinely enjoyable. So, go ahead and treat yourself to a professional brush set that matches your needs—your makeup game will thank you for it!

How to Draw Rupchanda Fish Step-by-Step
Marine Life Drawing

How to Draw Rupchanda Fish Step-by-Step

Draw Rupchanda fish might seem like a task only a skilled artist can handle. But guess what? With patience, a pencil, and this tutorial, even a beginner can sketch a beautiful and realistic Rupchanda fish. If you’re looking to improve your drawing skills, working on a school project, or just exploring your creative side, this guide will walk you through the process in a fun and easy way. We’ll also throw some pro tips and tricks to take your drawing from “eh” to “oh wow!” Alright, let’s drive into this aquatic journey, shall we? Materials You’ll Need to Draw Rupchanda Fish Before you begin, gather these basic art materials: Pro Tip: Always start with light pencil strokes. You can darken the outlines later once you’re happy with the structure. What is Rupchanda Fish? Rupchanda, commonly known as Chinese Pomfret, is a popular fish in South Asian and Southeast Asian cuisines. It’s known for its round, flat body and silvery sheen. The name “Rupchanda” is used in Bangladesh and parts of India, especially in Bengali cuisine, where it’s considered a delicacy. But beyond the kitchen, Rupchanda’s unique body shape and features make it a fascinating subject for drawing. Unlike other fish with elongated bodies, Rupchanda has a disc-like silhouette, which simplifies certain drawing elements and makes it ideal for beginner sketches. Step-by-Step Guide to Draw Rupchanda Fish Here’s the core of our tutorial; no joke intended! Follow these steps to animate your Rupchanda fish drawing. Step 1: Sketch the Basic Outline Begin your artwork by sketching a soft, rounded shape right in the middle of your paper, serving as the fish’s primary structure. Make the oval slightly wider in the middle and taper it off gently towards the tail area. The Rupchanda’s body is almost circular, so don’t elongate the oval too much. Now draw a faint line across the center—this will help you align the eyes and fins symmetrically. Tips: Step 2: Define the Head and Tail Inside the oval, mark off the front third for the head. Rupchanda fish has a slightly rounded snout, so sketch a small curved shape extending from the oval’s edge. Sketch the tail fin extending from the rear end of the oval shape. Rupchanda tails are forked, so draw two slightly curved triangles that fan out symmetrically. Tips: Step 3: Add the Fins Next, add the dorsal fin on the top side. It should be slightly pointed and curve back, running from the mid-back to near the tail. Then, draw the anal fin at the bottom—mirror the dorsal fin but make it slightly smaller. Now for the pectoral fins—these are located near the gill area. They’re shaped like leaves or small wings. Add one on each side, though the far-side fin will be partially hidden. Tips: Step 4: Draw the Eyes and Gills Place the eye just behind the snout area. It should be round and slightly bulging. Sketch a small circle and a tiny dot inside for the pupil. Behind the eye, draw a curved line to suggest the gill slit. You can add subtle texture lines radiating from the gill to the edge of the face for detail. Tips: Step 5: Finalized the shape and the detail Once you’re happy with the structure, darken the main outlines. Refine the fins and tail to make them more natural and smooth. Now, it’s time for scales. Start at the top and move downward, drawing small overlapping ‘U’ shapes. Don’t draw each scale perfectly—imperfections add realism. Tips: Adding Texture and Shading for Realism Here’s where your Rupchanda fish drawing starts to pop, shading and texture bring your flat lines to life. First, identify your light source. Imagine the light source shining from the upper left corner. That means the lower right of your fish will have deeper shadows. To create the scaly texture, lightly shade around the edges of the scale lines you’ve drawn. There’s no need to shade each scale; just add enough detail to suggest the overall texture. Pro Tips: Color Your Drawing (Optional) If you’re in the mood for color, colored pencils or watercolors can make your drawing even more lifelike. Rupchanda fish typically have a silver-blue tone with hints of white, pink, and yellow in the light. Coloring Steps: Watercolors give a more realistic finish, but colored pencils are easier for beginners to control. Coloring Tips: Common Mistakes to Avoid Even skilled artists can make mistakes. Here are some common pitfalls to avoid: Quick Fixes: Practice Exercises for Improvement Practice makes perfect—especially with drawing! Here are some fun exercises to level up your Rupchanda fish sketches: A. Quick Gesture Drawings Set a timer for 5 minutes and sketch the fish shape quickly. This builds muscle memory and improves your line flow. B. Shadow Studies Use a reference photo and practice only shading, without worrying about outlines. Focus on the light and shadow interplay. C. Scale Detailing Practice scale textures separately on scrap paper. Experiment with size, spacing, and shading until it looks natural. These exercises not only help you with this drawing but also train your eyes and hands for other fish and aquatic sketches. Tips for Creating a Portfolio-Worthy Fish Drawing Want to show off your drawing or include it in your art portfolio? Here’s how to refine it further: Presentation Tips: FAQs 1. Can beginners draw Rupchanda fish easily? Absolutely! This tutorial is designed with beginners in mind, guiding you step by step through the drawing process. 2. What kind of paper should I use for fish drawing? Standard sketch paper works fine, but if you plan to color or use watercolor, go for thicker, textured paper. 3. How can I make my drawing look more realistic? Focus on shading, adding highlights, and using a reference image to understand the fish’s anatomy and texture. 4. Do I need to draw every scale? Not necessarily. Suggesting scale texture in key areas can often be more effective than drawing each one in detail. 5. Can I use digital tools for

How to Draw an Owl Easy
Bird Drawing Ideas

How to Draw an Owl Easy: Guide for Beginners

Owls have long fascinated artists and nature enthusiasts with their mysterious aura and striking features. Whether you’re a budding artist or simply looking for a fun activity, learning how to draw an owl easy can be an enjoyable and rewarding experience. This guide will take you through a step-by-step process, helping you create an impressive owl sketch even if you’re a beginner. Materials You’ll Need To get started, gather the following materials: Having the right tools ensures you can focus on the drawing process without interruptions. Step 1: Draw the Basic Shapes Start with simple shapes to outline the owl’s body: 1. Head: Start by drawing a large oval or circle at the top center of your paper.. This will form the owl’s head. 2. Body: Positioned beneath the head, sketch a slightly larger oval or egg-like shape to form the body. 3. Guidelines: Lightly sketch a vertical line down the center of the head and a horizontal line across it to position the facial features symmetrically. This foundational step makes it easier to draw an owl easy by focusing on proportions and alignment. Step 2: Add the Facial Features 1. Eyes: Draw two large circles on either side of the vertical guideline within the head oval. These will be the owl’s prominent eyes. Within each circle, draw a smaller circle for the pupils, shade them in, and leave a tiny white dot to create highlights. 2. Beak: Draw a small, downward-pointing triangle between the eyes, slightly below the horizontal guideline. 3. Facial Disk: Add two curved lines extending from the top of the head to the base of the beak, forming the characteristic round face of the owl. This step brings the owl’s face to life and establishes its expressive features. Step 3: Outline the Wings and Tail 1. Wings: On each side of the body oval, draw elongated curved shapes that taper toward the bottom. These represent the owl’s folded wings. 2. Tail: Sketch a small rectangular block or a few gently curved lines at the lower end of the body oval to represent the tail feathers. 3. Feet: Draw two small, curved shapes extending downward from the bottom of the body. Each foot should have three toes for a simple, cartoonish look. Outlining these features ensures that your owl drawing maintains a balanced appearance. Step 4: Define the Owl’s Feathers To make the drawing more realistic: 1. Head Feathers: Draw small, arched strokes encircling the head to mimic the look and texture of feathers. 2. Body Feathers: Use overlapping U-shaped or scalloped lines across the body to create the appearance of layered feathers. 3. Wings and Tail: Add straight or slightly curved lines along the wings and tail to indicate feather patterns. Step 5: Fix Details and Polish the Drawing 1. Eyes: Darken the pupils and outline the irises to make them pop. 2. Beak: Add slight shading or texture to give depth. 3. Feathers: Enhance the feather details by thickening some lines or adding additional texture with short, sharp strokes. 4. Background (optional): Sketch a branch for the owl to perch on or add a simple night sky with stars and a moon. Step 6: Add Color and Shading 1. Color: Use colored pencils or markers to add hues to your owl. Browns, grays, and whites work well for a realistic owl, while vibrant colors can make it more whimsical. 2. Shading: Lightly shade areas where shadows naturally fall, such as under the wings and around the face. 3. Blending: Smooth out pencil lines with a blending tool to create soft gradients. Coloring and shading breathe life into your drawing, making it more engaging and dynamic. Pro Tips for Beginners Video Tutorial | Draw an Owl Easy You may feel interested to read about how drawing helps you think! Final Thoughts Learning how to draw an owl easy can be a fun and accessible project for artists of all levels. By breaking the process into simple steps and practicing regularly, you’ll soon be able to create beautiful owl illustrations. Whether you’re drawing for relaxation or improving your skills, this guide provides all the tools you need to succeed. So grab your materials and start drawing your owl masterpiece today!

Dual Tip Art Markers Sketch Pens A Comprehensive Dissection
Blog

Dual Tip Art Markers Sketch Pens: A Comprehensive Dissection

Creating vibrant and detailed artwork requires skill and the right tools. Dual tip art markers sketch pens have become a favorite among artists for their versatility and rich color output. In this comprehensive product review, we’ll delve into the features of these markers, explore their applications, and provide a detailed from the real experience step by step. Advantages of Using Dual Tip Markers Creating vibrant and detailed artwork requires skill and the right tools. Dual tip art markers sketch pens have become a favorite among artists for their versatility and rich color output. In this comprehensive product review, we’ll delve into the features of these markers, explore their applications, and provide a detailed from the real experience step by step. Selecting the Right Dual Tip Markers When choosing dual tip markers, consider factors such as ink quality, color range, and nib durability. Brands like Caliart and Shuttle Art offer sets with extensive color selections and reliable performance. For instance, Caliart’s 100 Colors Dual Tip Art Markers are praised for their seamless blending capabilities, suitable for both beginners and professionals. citeturn0search0 The Chromatic Spell of Dual Tip Markers In an arena where pigments pirouette on parchment, the Dual Tip Art Markers Sketch Pens arrive like an orchestra – vivid, layered, and harmoniously precise. These aren’t just coloring tools; they are instruments of chromatic expression, ensorcelled with duality – fine point meets broad chisel in a symphony of hue. Emerging from the palette-laden dreams of illustrators, crafters, and design visionaries, these pens do not whisper – they declare. Through bursts of boldness and nuances of subtlety, their versatility becomes a hymn sung by the hands of those who dare to sketch, shade, and sculpt with ink. Anatomy of the Dual-Tip Design Forged with utilitarian elegance, the dual-ended design is no mere flourish – it is a strategic elevation. On one end, a nimble, fine-tipped emissary for detail and dexterity; on the other, a robust chisel head that spills color in wide, confident strokes. The casing, often cloaked in ergonomic tactility, ensures grip doesn’t slip when creativity surges. Each marker is a sleek capsule of intent, crafted not just for function but for aesthetic alignment with the artist’s form and flair. A Deep Dive into Pigmentation & Flow The ink – oh, the ink is not merely liquid color. It is an alchemical brew, steeped in richly saturated tones that defy fading and surrender only to imagination. Whether alcohol-based or water-hinged, the flow remains unerringly smooth, a stream of constancy even on the coarsest canvas. No blotching. No bleeding tantrums. Just steadfast glide, akin to a ballerina’s pirouette across unyielding wood. From Needlepoint Precision to Broad Flourish Herein lies the crux of their duality. The nimble tip whispers intricacies with surgical finesse, while the chisel broadens the conversation. Each stroke becomes a choice: will you ink the gentle curve of a petal or the dramatic expanse of a twilight sky? This ambidextrous tool bridges the sketchbook and the storyboard, the blueprint and the gallery. Calligraphy, manga, architecture, or abstract – each genre bows to the fluidity these pens confer. Usability Across Media & Materials Canvas. Cardstock. Vellum. Recycled pulp. These pens hold their own across a carnival of mediums. The ink seeps and settles like rain on thirsty earth, adapting without complaint. What’s more, their usability extends beyond paper onto textiles, ceramics, and mixed-media collages. The dual-tip design dances with acrylics, flirts with graphite, and dialogues with charcoal. Few tools converse with other media so fluidly. Spectrum, Blending & Layering Brilliance When it comes to palette, Dual Tip Art Markers Sketch Pens do not arrive modestly – they enter as a chromatic pantheon. From glacial blues to embered scarlets, the shades are both primal and poetic. But the true art? Their ability to layer without conflict. Blend without bleed. A whisper of one color into another becomes seamless, a watercolor-like transition that betrays no boundaries. With patience, gradients emerge like auroras, unexpected, soft, and soul-stirring. The Test of Time and Handling Durability is not sacrificed at the altar of artistry. These pens endure—both in ink reservoir and physical integrity. Caps snap with satisfying assurance. Tips resist fraying even after prolonged duress. Even the most fervent sketch sessions find no complaint here. Left uncapped momentarily? They forgive. Tossed into a travel bag? They hold firm, ever ready to articulate color at a moment’s notice. Who Are They For? Artists, Tinkerers, and More Do not be deceived into thinking these pens belong solely to professionals. Nay, they woo the amateur dabbler, the calligraphy romantic, the comic-book conjurer, the journaling monk, and the stationery aficionado alike. Whether you breathe design by trade or doodle in café corners, these pens extend an invitation to participate in color’s narrative. Should You Inkscribe These into Your Arsenal? The Dual Tip Art Markers Sketch Pens do not simply earn a place—they demand one. In a world teeming with disposable tools and gimmicks masked in packaging, these markers endure as an artistic companion, not just a utensil. From the ease of duality to the depth of color, the seamless blend to the lasting structure, they provide not just ink but an invitation to draw, dream, and detail a world otherwise unspoken. Should you acquire them? Unequivocally. If you paint with vision and imagine in hue, this is your wand. The question is no longer if you should add them, but how soon. Final Words In summary, Dual-Tip Art Markers and Sketch Pens are far more than mere instruments of ink—they are extensions of the creative spirit, tailored for those who see the world not just in black and white but in sweeping gradients of possibility. Their dual-ended brilliance offers both control and liberation, enabling artists to navigate from precision to expression with a single flick of the wrist. Whether you’re a seasoned illustrator sketching masterpieces or a curious soul exploring color for the first time, these markers rise to meet your intention. With fluid ink flow, rich pigmentation, resilient design,

Double Rhythm 0.5 OZ Cat Eye Gel Polish
Blog

Double Rhythm 0.5 OZ Cat Eye Gel Polish

When it comes to nail art, trends evolve faster than we can blink. However, one trend that has stood the test of time is the mesmerizing cat-eye effect. If you’re on the hunt for a gel polish that delivers impeccable shine, depth, and a stunning cat-eye effect, look no further than the Double Rhythm 0.5 OZ Cat Eye Gel Polish. In this in-depth review, we will explore why this product has become a favorite among both amateur and professional nail artists. First Impressions Matter The moment you lay your eyes on the sleek packaging of the Double Rhythm 0.5 OZ Cat Eye Gel Polish, you know you’re in for a treat. Encased in a sturdy, elegant bottle with a reflective label that hints at the shimmering magic inside, it sets high expectations — and it does not disappoint. Available in a spectrum of rich, iridescent shades, this gel polish offers something for every mood — whether you’re channeling a mystical night sky or an opulent jewel tone. Application: Smooth as Silk One of the standout features of this product is its buttery consistency. Neither too thick nor too runny, it glides onto nails with precision. Even if you are a beginner, the user-friendly brush ensures a smooth and even coat with minimal effort. Key Highlights of the Application Process: The Magic of the Double Rhythm 0.5 OZ Cat Eye Gel Polish The hallmark of this gel polish is undoubtedly its ability to create a hypnotic cat-eye effect. Paired with a high-quality magnet tool, the polish responds instantly, forming mesmerizing linear or curved designs that shift under light. Why It Stands Out: Durability: Built to Last No one wants a stunning manicure that chips after two days. Fortunately, the Double Rhythm 0.5 OZ Cat Eye Gel Polish is built to last. What We Noticed: Color Selection: A Shade for Every Mood Double Rhythm offers an impressive variety of shades to cater to different tastes. Whether you prefer deep, galaxy-inspired hues or light, pastel tones, you will find something that speaks to you. Some Fan Favorites: Removal Process: Gentle on Nails One common downside of gel polish is the dreaded removal process. However, Double Rhythm has made it surprisingly hassle-free. Our Experience: Value for Money: Worth Every Penny At 0.5 OZ, this gel polish offers ample product for multiple uses, making it highly cost-effective. Considering its durability, high pigmentation, and premium finish, it provides excellent value for its price point. Why It Justifies the Cost: Who Is It Best For? This gel polish is perfect for: A Few Tips for Best Results: Final Verdict: Is It Worth It? Absolutely. The Double Rhythm 0.5 OZ Cat Eye Gel Polish checks all the boxes: it offers unparalleled shine, mesmerizing cat-eye effects, and durability that outlasts the competition. Whether you are a nail art aficionado or someone looking to add a little sparkle to your everyday look, this product is a must-try. In a sea of gel polishes, Double Rhythm stands tall, offering both style and substance. So go ahead — give your nails the star treatment they deserve.

How Drawing Helps You Think
Blog

How Drawing Helps You Think: Benefits of Drawing

In recent years, the idea of drawing as more than just a creative outlet has gained significant attention in cognitive science and psychology. People are increasingly discovering how drawing helps you think more clearly, enhances problem-solving skills, and even fosters emotional well-being. Grave the benefits of drawing. From enhancing memory and focus to improving communication, the act of drawing offers a wide array of cognitive benefits. This article will explore how drawing helps you think in various contexts, from improving mental clarity to boosting creativity and intellectual capacity. How Drawing Helps You Think: A Cognitive Perspective The process of drawing engages several areas of the brain, particularly those linked to creativity, visual processing, and even emotions. When you draw, you are not simply marking paper with shapes and lines; you are actively engaging your mind in a dynamic and creative activity that requires focus, concentration, and interpretation.  As you engage in this process, your brain begins to establish connections between seemingly unrelated concepts. Enhancing both lateral thinking and problem-solving abilities. This is why many people find that when they draw or doodle during meetings. Or brainstorming sessions, they often come up with more innovative and creative ideas. 1. Drawing Enhances Memory and Learning One of the most direct ways that drawing helps you think is through its impact on memory retention and learning. This has been widely studied in cognitive psychology, with evidence showing that visual representations improve comprehension and recall. The act of drawing integrates both verbal and visual components in the brain, making it easier to retain and recall information. In educational settings, students often benefit from drawing diagrams or illustrations to accompany text-based learning. This visual strategy taps into the brain’s natural ability to process visual stimuli, which can significantly enhance understanding and retention. 2. Drawing Improves Problem-Solving Skills Another crucial benefit of drawing is its positive impact on problem-solving. Whether it’s sketching a design or visualizing a solution to a complex problem. Drawing helps you break down a task into manageable parts and provides clarity for resolving issues. Research has shown that creative exercises such as drawing can significantly enhance lateral thinking, which is the ability to approach problems from different perspectives. This form of problem-solving is invaluable not only in the arts but in various professions, from engineering to business. 3. Drawing Stimulates the Brain’s Visual Processing Areas The human brain is designed to process visual information more quickly than textual or verbal data. By drawing, you engage the brain’s occipital lobe, which is responsible for processing visual stimuli. This interaction boosts cognitive function and increases mental clarity. 4. Drawing as a Tool for Emotional Expression and Clarity In addition to its cognitive benefits, drawing can also be an essential tool for emotional clarity and self-expression. When you’re feeling overwhelmed or stressed, drawing can serve as a cathartic release, allowing your brain to process emotions in a non-verbal form. For many people, art therapy, including drawing, has been used as a way to cope with trauma, grief, or anxiety. By translating emotional turmoil into visual forms, individuals gain insight and emotional release, which can lead to improved cognitive functioning overall. 5. Drawing Enhances Communication and Idea Sharing Drawing can be an invaluable tool for conveying ideas, especially when verbal communication may fall short. 6. Drawing Boosts Creativity | How Drawing Helps You Think One of the most commonly cited reasons for how drawing helps you think is its powerful impact on creativity. Whether you’re an artist or not, engaging in drawing exercises allows you to think outside the box, explore new ideas, and come up with original solutions. 7. Drawing Strengthens the Connection Between Mind and Body Drawing is a holistic activity that connects the mind with the body, fostering better coordination and enhancing cognitive processes. The process of creating art requires physical engagement through hand movements, which enhances motor skills, spatial reasoning, and sensory integration. Conclusion: How Drawing Helps You Think More Clearly and Creatively As we’ve seen, drawing is not just an art form; it is a powerful cognitive tool that enhances problem-solving, boosts memory retention, improves focus, and stimulates creativity. Whether you’re a student, a professional, or simply someone looking to sharpen your mind, integrating drawing into your daily life can be a valuable way to engage your brain and improve your thinking. From the way drawing helps you think by fostering creativity and critical thinking, to its emotional and therapeutic benefits, the positive impact of drawing on the brain cannot be overstated. By incorporating more drawing into your life, you can unlock new cognitive pathways, refine your communication skills, and improve your problem-solving abilities. It’s clear that the simple act of putting pen to paper can have a profound effect on your mental clarity and overall cognitive function. So, the next time you’re faced with a challenging task or need to clarify your thoughts, remember how drawing helps you think—and give it a try!

How to draw a squirrel easy Squirrel Drawing Easy Steps For Beginners
Animals Drawing Ideas, Blog

How to Draw a Squirrel Easily

Drawing a cute squirrel might seem challenging, but with a few simple steps, anyone can create an amazing squirrel sketch. This tutorial is designed for beginners and casual artists who want to learn how to draw a squirrel easily, focusing on basic shapes and simple techniques.  If you’re looking to improve your drawing skills or just enjoy a fun, creative activity, this guide will take you through the process, step by step. With just a pencil, paper, color pencil and few necessary sketching iteams, you can create an interesting squirrel.  So, grab your supplies and follow along as we break it down into easy-to-follow steps! Basic Structure Sketching of the Squirrel Step 1: Drawing the Head Shape  To begin drawing the squirrel, start by sketching a simple circle for the head. This will serve as the foundation for the rest of the features. Next, add a small oval shape just below the circle for the snout. Remember to keep your lines light, as these are just guidelines to help with proportion and placement.  These basic shapes will make it easier to refine the squirrel’s facial details later on in the drawing process. Step 2: Ears and Facial Features  Now, sketching the head and snout, add two small, curved triangles on top of the head for the ears. Next, draw two round eyes inside the head circle, positioned evenly for a balanced look. Place a small, rounded nose at the tip of the snout, and below it, sketch a tiny curved line to form a smiling mouth.  These details will bring your squirrel’s face to life, making it look friendly and expressive. Keep your lines light and adjustable for now.  Step 3: Drawing the Body Outline  To draw the squirrel’s body, start by sketching a large oval shape beneath the head. This oval will form the main structure of the body. Once the body shape is in place, add a simple line or curved stroke from the head to the bottom of the oval to guide the posture.  This line will help position the squirrel, ensuring a natural and balanced stance for the final drawing. Keep the shapes light for easy adjustments later.   Step 4: Adding the Tail of the Squirrel To add the squirrel’s iconic tail, start by drawing from the lower back of the body. Create a large, curved shape that extends upward and away from the body, making sure the tail is bigger and fluffier than the body itself. The curve should have a soft, flowing motion to reflect the bushy nature of a squirrel’s tail.  This oversized, curved tail will reflect your drawing character and help capture the squirrel’s playful and energetic appearance. Step 5: Legs and Paws  To draw the squirrel’s legs, start by sketching two very smal lines extending downward from the body to form the front legs. At the end of each line, draw small ovals to represent the front paws. For the back legs, create two small ovals attached to the lower part of the body, near the back.  Add a few curved lines extending from the back legs to shape the hind paws. These simple shapes will provide the basic structure for the squirrel’s limbs. Step 6: Refining and Detailing the Squirrel Drawing Now that the basic shapes are in place, it’s time to refine your squirrel drawing. Go over the lines and fix the segments, especially around the tail, body, and face. Add more details to the fur by sketching small, curved strokes along the edges of the tail and body to give it a soft, bushy texture.  Darken the eyes, nose, and mouth to make the facial features stand out. This step adds realism and character to your squirrel drawing. Step 7: Finalizing the Facial Features of Squirrel  To finalize the squirrel’s facial features, start by darkening the eyes to make them stand out and give the face a lively expression. You can leave a small white area in each eye for a highlight effect.  Next, add small dots around the nose to represent whisker spots and sketch a few short lines around the mouth for extra detail. These subtle touches will bring more depth and personality to the squirrel’s face, making it look more realistic and expressive. Step 8: Finalizing the Outline of the Squirrel Sketch To finalize the outline of your squirrel sketch, carefully go over the key lines with a darker pencil or marker pen. This will give the drawing a clean and polished look. Focus on the main shapes, such as the head, body, legs, and tail, to make them more defined.  Once you’ve traced the final outline, gently erase any unnecessary guidelines and lighter sketch marks. This will leave you with a crisp, well-structured squirrel drawing, ready for coloring or additional details. Step 10: Adding Color on Squirrel Sketch To bring your squirrel sketch to life, use light brown, gray, or reddish tones for the body and tail, depending on the squirrel species you want to depict. Lightly color in the body, keeping your strokes smooth and even. For added depth, use darker shades in areas where shadows naturally fall, such as beneath the legs, under the tail, and around the belly.  Next, color the nose and eyes black, leaving small white highlights to give them a shiny, lively appearance. This combination of colors and shading will add dimension and realism to your finished squirrel drawing. Conclusion In conclusion, drawing a squirrel is easy when you break it down into simple steps. Starting with basic shapes for the head and body, adding details like the legs, tail, and facial features, and refining the outline makes the process straightforward and fun. Adding color and shading brings your squirrel to life, giving it personality and depth.  Now that you’ve mastered these steps, try experimenting with different poses or styles to make your squirrel drawings unique. With practice and creativity, you’ll be able to create squirrels in various playful settings. Keep exploring, and enjoy the process of

Drawing Artificer Logo

Drawing Artificer is an artistic platform that provides a vest of Drawing Ideas and Artistic knowledge. 

Drawing Artificer participates in the Amazon Services LLC Associates Program, an affiliate advertising program designed to provide a means for sites to earn advertising fees by advertising and linking to Amazon.com. *Amazon and the Amazon logo are trademarks of Amazon.com, Inc., or its affiliates.

© 2025 Drawing Artificer. All rights reserved

Get 30% off your first purchase

X
Scroll to Top