Drawing is one of the most enjoyable and relaxing hobbies, and if you’re just starting, fruits are the perfect subject to begin with. Why? Because fruits are everywhere, they come in all shapes and sizes, and most importantly, they’re simple to sketch. Whether you’re doodling for fun, improving your artistic skills, or even teaching kids how to draw, learning easy fruits drawing can be both educational and entertaining.
So, if you’ve always wanted to draw but didn’t know where to start, this guide will walk you through everything step by step – from understanding basic shapes to creating stunning fruit sketches that you’ll be proud of. Let’s dive in!
Tools and Materials You’ll Need
Before you start drawing, let’s talk about the tools you’ll need. Don’t worry – you don’t have to break the bank. Most of these supplies are things you probably already have at home.
Basic Drawing Supplies
Essential Drawing Supplies are you will need.
- Pencils: Start with an HB pencil for sketching and a softer pencil (like 2B or 4B) for shading.
- Eraser: A good eraser is your best friend, especially when practicing.
- Drawing Paper: You don’t need expensive sketchbooks; simple white paper works just fine.
Optional Tools for Shading and Coloring
- Colored Pencils: Perfect for bringing your fruits to life.
- Markers or Crayons: Great for bold and vibrant fruit sketches.
- Blending Stump: Helps smooth out shading for a realistic effect.
Digital Tools for Fruit Drawing
If you’re into digital art, a tablet and stylus can make fruit drawing even easier. Apps like Procreate, Sketchbook, or Adobe Fresco allow you to play around with colors, textures, and brushes without worrying about wasting paper.
At the end of the day, the most important tool is your practice and creativity. Even a rough sketch can look beautiful when you put effort into it.
Understanding Shapes in Fruit Drawing
Every complex drawing starts with simple shapes. That’s why understanding basic forms is essential if you want to draw fruits that look both accurate and appealing.
Breaking Fruits into Simple Shapes
Most fruits can be broken down into circles, ovals, and cylinders. For example:
- An apple is a slightly uneven circle.
- A banana is a curved oval.
- Grapes are a collection of small circles.
- A pineapple starts as a tall oval with a leafy crown.
By practicing these shapes, you’ll build a solid foundation for sketching more complex fruits.
Practicing Circles, Ovals, and Cylinders
Grab a sheet of paper and fill it with circles and ovals. Try to keep them even and clean. Then, move on to cylinders, which are great for bananas or mangoes. The more you practice, the easier it becomes to sketch fruits quickly and confidently.
The Role of Symmetry in Drawing Fruits
Many fruits, like apples and oranges, have natural symmetry. Paying attention to this helps your drawings look more balanced and realistic. A useful trick is to draw a light centerline to guide your proportions before adding details.
By breaking fruits down into these simple components, you remove the fear of “not knowing where to start.” It’s like learning the alphabet before writing sentences – once you know the building blocks, everything else becomes easier.
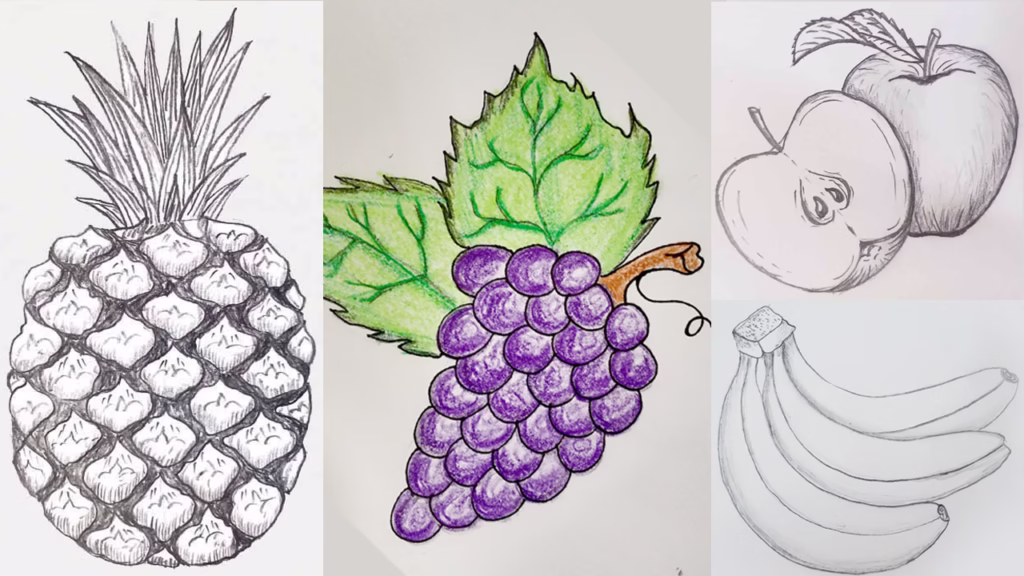
Step-by-Step Guide to Drawing Common Fruits
Now that you’ve got your tools ready and understand basic shapes, let’s dive into drawing some of the most common and easy fruits.
How to Draw an Apple
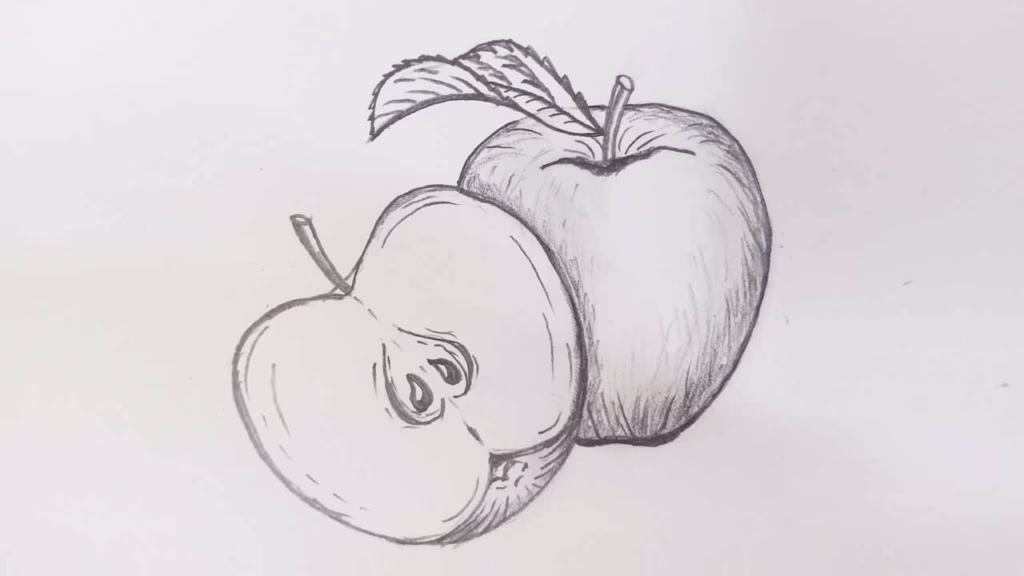
- Start with a simple circle.
- Add a slight inward curve at the top to form the apple’s dip.
- Draw a short stem coming out from the top.
- Add a leaf for extra detail.
- Shade one side lightly to show roundness.
How to Draw a Banana

- Sketch a curved oval shape.
- Add slight ridges along the length of the banana.
- Draw the stem at both ends.
- Shade along the curve to give it depth.
How to Draw Grapes
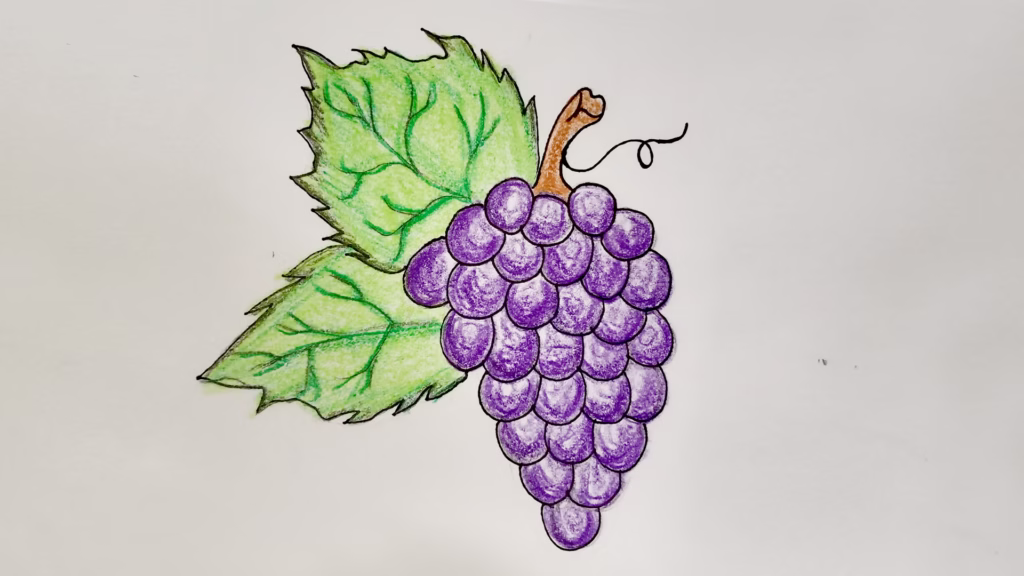
- Draw small circles clustered together.
- Vary their sizes to make it look realistic.
- Add a stem on top.
- Shade lightly to show overlapping grapes.
How to Draw a Pineapple
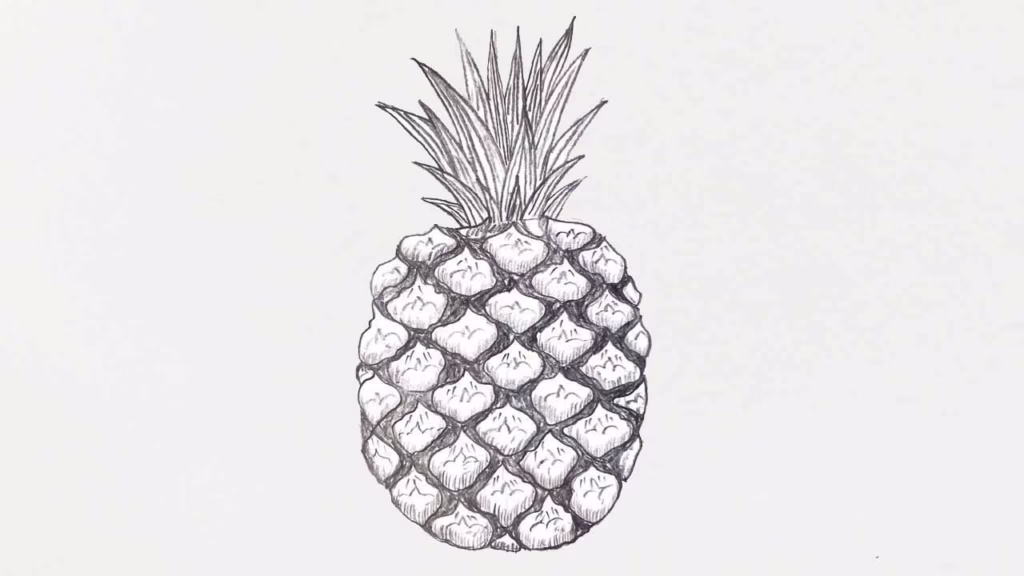
- Start with a tall oval shape.
- Add crisscrossing diagonal lines for texture.
- Draw the leafy crown on top.
- Shade the skin to give it depth.
Each of these fruits can be drawn in just a few minutes, and with practice, you’ll notice your lines getting cleaner and your shading improving.
Adding Details and Shading
Outlining is only half the job – what makes your fruit sketches pop is shading and details. Without them, fruits look flat and lifeless. With them, they look realistic and full of dimension.
Light Source and Shadow Placement
Always imagine where the light is coming from. If the light is on the left, then the right side of the fruit should be darker. Adding shadows underneath also makes the fruit look like it’s sitting on a surface instead of floating in space.
Adding Texture to Fruits
- Apples and mangoes are smooth, so use soft shading.
- Oranges have a rougher texture – small dots can mimic this effect.
- Pineapples have a scaly surface, so detailed patterns are important.
Tips for Realistic Shading
- Start light, then build darker layers.
- Blend the shading for smooth fruits.
- Use cross-hatching for textured fruits.
When you add these details, your drawings stop looking like basic outlines and start looking like real, delicious fruits.
Coloring Techniques for Fruit Drawings
Once your fruit sketches are outlined and shaded, it’s time to add some life to them with colors. Coloring is what transforms a simple pencil sketch into something eye-catching and vibrant. Depending on the tools you have, you can use colored pencils, markers, watercolors, or even digital art software.
Using Colored Pencils
Colored pencils are one of the easiest and most accessible tools for fruit drawings. They allow you to build color layers by layer, making your fruits look rich and natural.
- Start light and gradually darken areas where shadows fall.
- Blend colors – for example, red and yellow can create a realistic apple tone.
- Use a white pencil to add highlights and shine.
Watercolor Techniques for Fruits
Watercolors work beautifully for fruits because they can capture the natural softness and blend of colors.
- Begin with light washes of the main fruit color.
- Add layers for depth once the first layer dries.
- Use more water for smooth fruits like grapes, and less water for rough ones like pineapples.
Digital Coloring Tips
If you’re working digitally, you have endless options for textures and effects.
- Use soft brushes for smooth fruits like bananas or mangoes.
- Try textured brushes for pineapples and oranges.
- Play with opacity to create natural-looking shading and blending.
No matter which medium you choose, the key is patience. Take your time with layering and blending – this is what makes your fruits pop with realism and charm.
Easy Fruits Drawing for Kids
Fruits are not only fun for adults to draw but also perfect for kids. Since fruits are made of simple shapes, children can quickly learn how to draw them.
Simplified Methods for Beginners
- Teach kids to start with basic shapes (a circle for apples, an oval for mangoes).
- Use bold outlines to make drawings easier to recognize.
- Encourage them to use bright colors to make the drawings fun.
Fun Drawing Games with Fruits
Drawing doesn’t always have to be serious – it can be turned into a playful activity.
- Fruit Guessing Game: One child draws a fruit, and others guess which fruit it is.
- Fruit Coloring Race: Kids race to color their drawings neatly.
- Storytelling with Fruits: Draw different fruits and create a short story around them.
These fun exercises not only improve drawing skills but also enhance creativity and imagination in kids.
Advanced Fruit Drawing Techniques
Once you’re comfortable with basic sketches, you can step up your game with advanced techniques that make your fruits look more realistic and professional.
Cross-Hatching for Depth
Instead of simple shading, try cross-hatching (drawing intersecting lines) to create depth. This works well for rough fruits like pineapples and melons.
Blending Colors for Realism
Fruits rarely come in one solid color. Apples can be red with green patches, and bananas may have brown spots. Learning to blend multiple colors makes your drawings much more natural.
Adding Highlights for Shine
Highlights are small, bright spots where the light hits the fruit.
- Use an eraser to lift graphite for highlights in pencil drawings.
- Use a white pencil or gel pen for colored sketches.
- In digital art, use a soft white brush for glossy effects.
These little details bring your artwork to life, making fruits look juicy and three-dimensional.
Creative Fruit Drawing Ideas
Drawing doesn’t have to stop at single fruits – you can create creative compositions that make your artwork more engaging.
Fruit Basket Drawing
Sketching a basket filled with apples, bananas, and grapes is a great exercise for combining multiple objects. It also teaches you how to arrange fruits together naturally.
Cartoon Style Fruits
For a fun twist, try drawing fruits with faces, hands, and expressions. Cartoon fruits are popular in kids’ art books and can be used for stickers or fun posters.
Abstract Fruit Art
Who says fruits always have to look realistic? Try experimenting with bright colors, patterns, and unusual shapes. An abstract pineapple or rainbow-colored apple can look amazing as wall art.
FAQs
1. What is the easiest fruit to draw for beginners?
The easiest fruit to draw is an apple since it’s just a simple circle with a stem and a leaf.
2. How can I make my fruit drawings look realistic?
Focus on shading, highlights, and blending colors. Always decide where the light is coming from before adding shadows.
3. Do I need to color my fruit sketches?
Not necessarily—pencil sketches look great on their own. But adding colors can make them more lively and fun.
4. How long does it take to learn fruit drawing?
With regular practice, beginners can draw simple fruits within a week and move on to more advanced drawings in a few months.
5. Can kids improve handwriting skills through fruit drawing?
Yes! Drawing improves hand control and coordination, which can positively impact handwriting skills.
Conclusion
The best part? Drawing fruits doesn’t require fancy tools or expensive classes. With just a pencil, paper, and a bit of practice, you can create artwork that feels rewarding and fun. And if you ever feel stuck, remember – every artist once started with simple shapes. The more you practice, the better you’ll get, and soon you’ll see your sketches transform into beautiful, realistic, and colorful drawings.
So grab your sketchbook, pick your favorite fruit, and start drawing today. Who knows? A simple apple sketch might just be the first step toward discovering your hidden artistic talent.