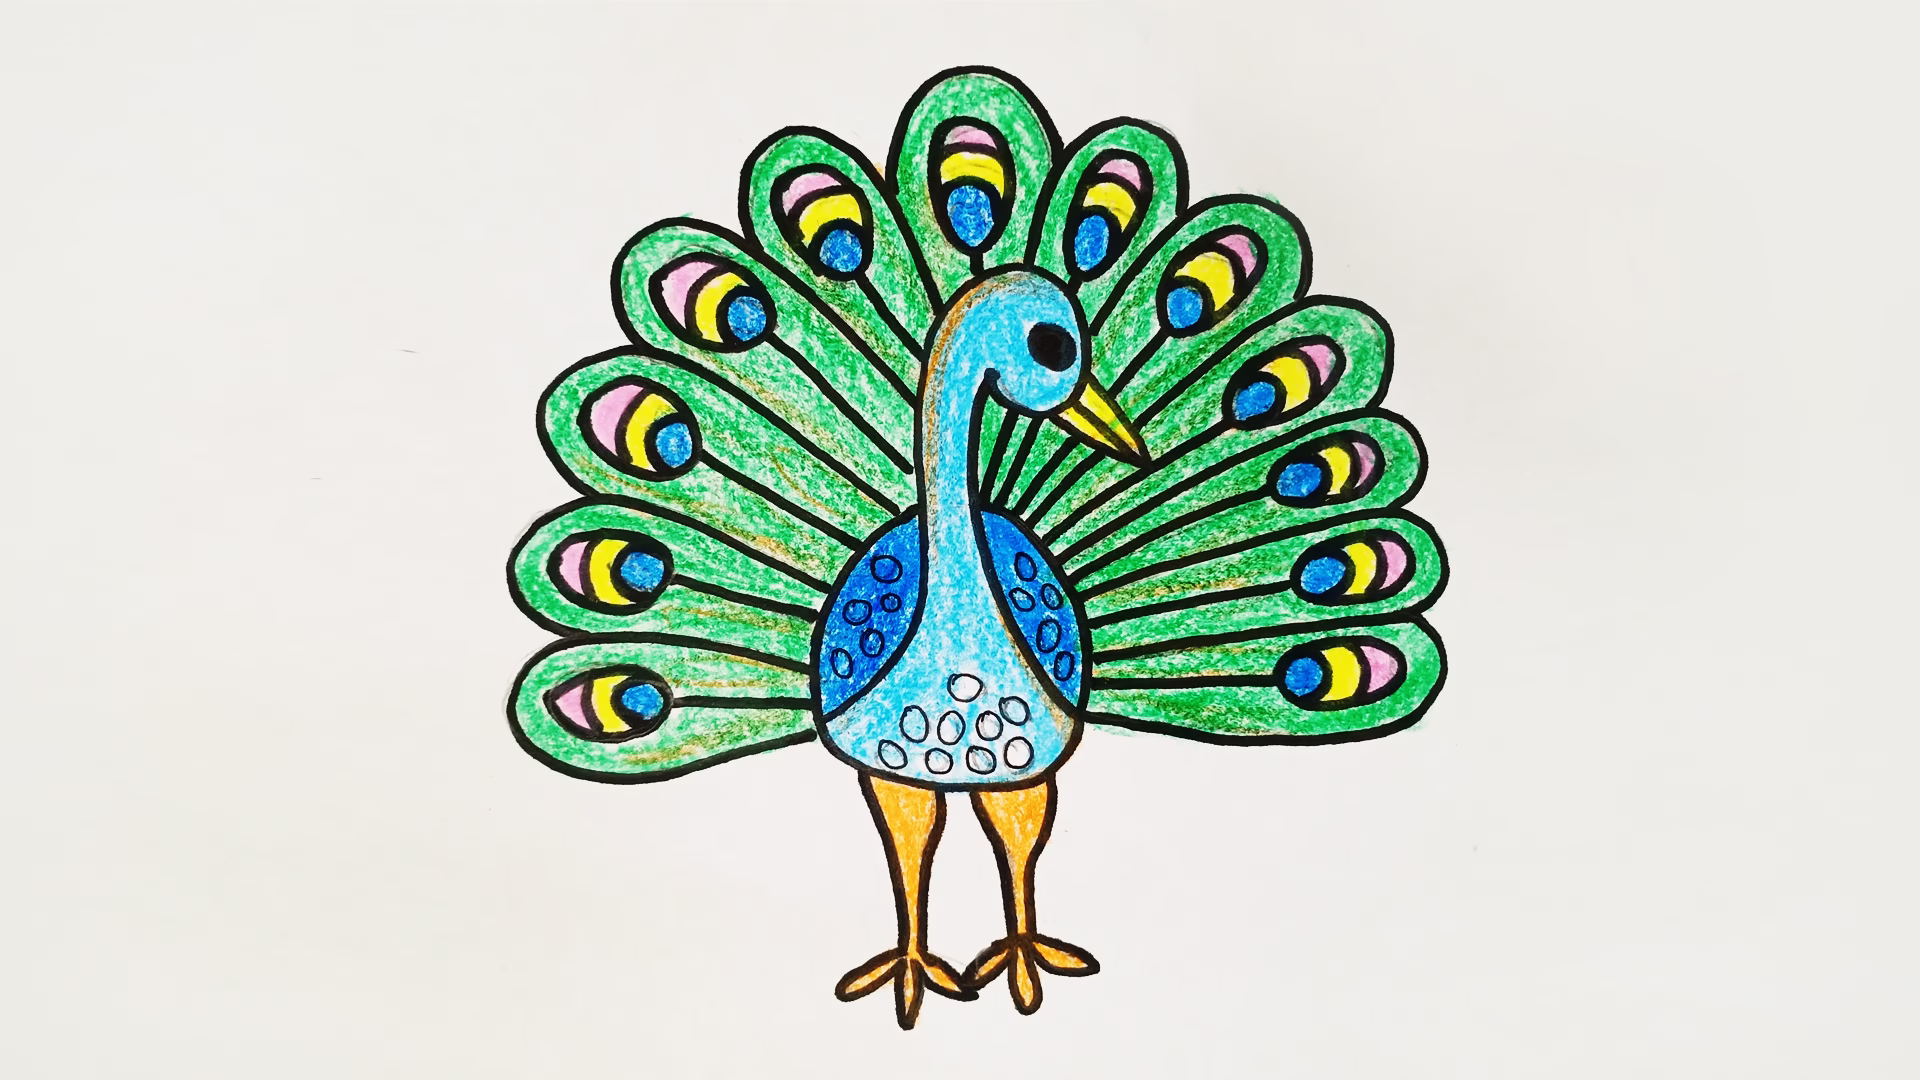
How to Draw a Peacock – Step-by-Step Guide for Beginners
Drawing a peacock is more than just an artistic endeavor – it’s a doorway to creativity, patience, and precision. Peacocks are renowned for their vibrant plumage, graceful posture, and intricate patterns. Capturing their beauty on paper may seem intimidating, but with the right guidance, anyone can learn to draw this majestic bird. This guide is designed specifically for beginners, walking you through each step clearly and simply. You’ll find that once you understand the basic shapes and feather placement, things start to fall into place beautifully. Think of this as building a puzzle – piece by piece, the image becomes more cohesive, and the sense of achievement becomes very real. Ready to bring a peacock to life on your sketchpad? Let’s get started with the tools you’ll need and what makes this bird such a rewarding subject. Why Drawing a Peacock is a Great Artistic Exercise You might wonder: why a peacock? Why not a cat, dog, or some simpler bird? Here’s the magic: drawing a peacock teaches you a wide range of essential drawing skills in one subject. This exercise strengthens your technical drawing abilities and sharpens your observation skills. Plus, once you get the hang of it, it’s incredibly fun! Tools and Materials You’ll Need Before we dive into sketching, let’s prepare your workspace. You don’t have to break the bank on fancy art materials – grab these simple essentials to begin your drawing journey: Essential Tools: Optional Add-ons: With your tools ready, you’re now equipped to begin drawing! Understanding the Anatomy of a Peacock If you want to draw something well, you need to understand how it’s built. Just like learning how a car works before driving, studying a peacock’s anatomy makes your drawing look accurate and lifelike. Let’s break it down into parts: Head and Crest: Peacocks have a small, rounded head with a crest of upright feathers that fan slightly. Their beak is slender and curved, while their eyes are usually round and expressive. Neck and Body: The neck is long, elegant, and curves naturally. It connects to a full, oval-shaped body that resembles a slightly squashed circle when viewed from the side. Wings and Legs: Peacock wings are not always fully visible since their tails often dominate the composition, but they are positioned toward the lower middle of the body. Legs are thin, with three toes in front and one in the back. Tail (Train): This is the main attraction! The tail fans out behind the peacock and is covered in “eye-spots”—circular feather patterns that resemble eyes. The tail can be drawn open in full display or down in a more relaxed position. Understanding these components allows you to draw confidently. Step 1 – Sketching the Basic Shapes Before diving into the fine details, let’s start with the foundation. Sketching basic shapes will guide your composition and ensure the proportions are correct. Think of it like building a house—you need a solid blueprint first. Drawing the Body and Neck Begin with the body, which resembles an oval or egg shape tilted slightly forward. This shape will act as the central part of your peacock, where the neck, wings, legs, and tail will all connect. It’s better to draw lightly so you can easily erase or modify your lines. Next, sketch the neck. Draw a graceful, elongated “S” shape extending upward from the top of the oval. This helps capture that natural, elegant curvature of the peacock’s neck. The width of the neck should be consistent but taper slightly near the head. Proportions to consider: This foundational step sets up the whole pose of your peacock. Try a few different positions—maybe the peacock is looking sideways or slightly tilted. Gesture drawing, or quick sketches that capture motion, can help warm you up here. Outlining the Head and Beak Now, at the top of the neck, draw a small circle for the head. This will later be refined, but for now, just get the placement right. From the circle, extend a short triangle outward for the beak, slightly curved and pointed. Add a small crosshair on the face (lightly) to position the eyes later. This helps you align facial features symmetrically. Remember: You can adjust the neck’s angle at this stage to capture the exact look you’re going for—graceful, proud, or even playful. Step 2 – Drawing the Eyes and Crest This part gives your peacock personality. Eyes and crest feathers are small, but they bring life to the bird’s face. Adding Expressive Details Start with the eyes. Place them just behind the beak and slightly below the centerline of the head. They should be almond-shaped or round, depending on your chosen style. Leave a small white highlight in each eye to make them sparkle. Use a softer pencil (2B or 4B) to darken the eyes and add depth. You can shade lightly around them to create a shadowed socket effect. Don’t forget the peacock’s crest—those elegant upright feathers that look like a tiny fan on top of the head. Draw about 5–7 thin stems rising from the crown, each ending in a small circle or teardrop shape. Tips: These touches bring grace and identity to your drawing. Even at this early stage, you should start seeing your peacock’s unique character. How to Make It Look Realistic Realism is all about attention to small features: Use a reference image here to guide your detailing. Try to capture that intelligent, curious expression peacocks often have. Your drawing is no longer just lines—now it’s a bird with personality. Step 3 – Shaping the Feathers and Tail Now we get to the showstopper: the tail. This is where patience, practice, and precision really come into play. Structure of the Peacock’s Tail Start with the tail base—draw two curved lines extending from the lower back of the peacock’s body. These will form the outer frame of the tail, like a giant fan behind the body. Inside this fan shape, begin sketching rows of feathers. Think of them like layers